


27 Best Photography Tips and Tricks for Beginners
It takes years to develop mastery in photography — but there are many photography tips and tricks you can learn to fast-track the process.
In today’s article, we’re going to dive into the absolute best photography tips for beginners that will improve your photography very quickly.
Let’s jump in!
27 Photography Tips for Beginners
- Engage Your Subject
- Cleaning Your Camera Lens
- Avoid Sensor Dust
- Avoid Camera Shake
- Exposure Check
- ND Filters
- Polarizing Filters
- Foreground Interest
- Using an L-Bracket
- Posing Large Groups
- Working with a Tripod
- Keeping it Level
- Understanding the Sunny 16 Rule
- Where to Stand
- Telephoto Lenses
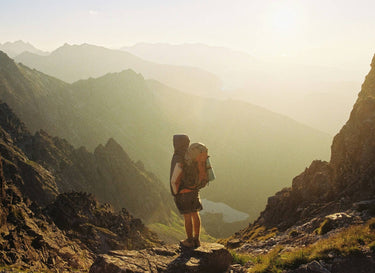
- Understanding Location
- Avoid Lens Flare
- Use Natural Light
- Include Odd Numbers
- Side Access Camera Bag
- Shutter Priority
- Depth of Field
- Rule of Thirds
- Wide Aperture
- Small Aperture
- Flash in Daylight
- Shoot into the Light
1. Engage Your Subject

It's no secret that many people feel awkward in front of a camera. As the photographer, it's your job to help them forget you're there.
Keep your models interested, make them laugh. You'd be surprised how much better your shots can be when you foster a positive and relaxed mood.
This may actually be the most basic photography tip we have, but it takes a lot of practice!
2. Clean Your Camera Lens
 Even if a few specs of dust on your lens don't matter, they'll add up over time.
Whenever you go out for a photoshoot, ensure that you bring cleaning solution and a microfiber cloth.
The type of cloth is important, as microfiber will ensure that no streaks or smudges get left on your camera.
3. Avoid Sensor Dust
Similarly to cleaning your lens, you'll want to avoid sensor dust. Even if small smudges and specs can be removed in photoshop, that's not something you'll want to deal with on the regular.
Be careful when working in dusty or windy locations. When you do work in these conditions, avoid having to change your lens.
Instead, consider using a zoom lens, as it can cover a range of distances during one photoshoot.
4. Avoid Camera Shake
Ever fumbled that fully zoomed in shot and felt so disappointed after? Unwanted camera shake is the worst.
Generally speaking, the best way to beat camera shake is by ensuring your shutter speed is equal to or faster than the focal length of the lens. For example, this would be at least 1/100 sec for a 100mm lens on a full-frame camera.
5. Exposure Check
Landscape photography is all about balancing bright skies and shadowed foregrounds. To do this properly, check your exposure by taking a look at your camera's histogram.
6. ND Filters
 To capture that bright, silky sky, try using an 10-stop ND (neutral density) filter. This particular filter allows for super-long exposures that will blur skies and seascapes.
7. Polarizing Filters

If you want deeper blue skies, better reflections, or less glare on the surface of the water, think about using a polarizing filter.
Placed in front of the camera lens, the filter will affect the composition of your shots.
Be aware of inconsistencies though, as you'll want to avoid an uneven sky tone. Keep practicing this photography tip and see how the filter affects the other settings on your camera.
8. Add Foreground Interest

Finding a beautiful, distant mountain is great, but your shot won't be nearly as interesting if you have an empty foreground.
Use a wide-angle lens and a small aperture to capture interesting rocks, trees or any other objects in the foreground of your shot.
This landscape photography tip can also easily be applied to portrait work as well.
9. Use an L-Bracket
Not every tripod is suitable for vertical shooting. So, if you want to get great vertical shots, try using an L-bracket.
Typically, an L-bracket will attach to the tripod head. Your camera can then be mounted sideways on the bracket.
This will allow you to take perfect vertical shots!
10. Pose Large Groups

No one wants that static, awkward family photo vibe when taking group shots.
Instead, try posing certain people in different ways, correlating outfits, or finding interesting locations. Capturing natural expressions or movement will make the shot flow far better.
11. Use a tripod
Tripods can be absolutely essential for certain shots. They provide crucial stability when you need it most.
After all, to close the aperture of your shot or reduce your ISO to the highest quality setting, you'll need a tripod to maintain balance.
12. Keep it Level
Especially when capturing landscapes, you'll want to ensure that your shot is level. When shooting, pay attention to the horizons level in your frame.
13. Use the Sunny 16 Rule
This outdoor photography tip can help you adapt to any type of natural lighting you'll come across.
The Sunny 16 rule helps you manage your aperture in any lighting condition, and is generally as follows:
- f/22 for snow/sand
- f/16 for sunshine
- f/11 for slight overcast
- f/8 for barely visible overcast
- f/5.6 for heavy overcast
- f/4 for shade or sunset
14. Compose your Shots
 Knowing where to stand can have a huge impact on your photograph. What does the angle of your shot say about your subjects and the world they live in?
Try to shoot from several different angles and see how it affects the composition of your shot.
This outdoor photography tip will instantly make your shot more dynamic.
15. Use a Telephoto lens

If you're going to capture the sun or those troublesome birds, think about using a telephoto lens.
This lens increases focal length, and has a narrow field of view. Using it, you can capture distant objects with the same level of precision as close-range ones.
This can be one of the best ways to capture wildlife, as you probably don't want to get to close that hungry bear catching salmon.
16. Location scout

Different locations will have different challenges. When you choose a location, think about what equipment you'll need.
For example, when you're shooting in the desert you have to be wary of dust and high temperatures.
Also consider location when working with models. As shown by the photo above, the model's wardrobe and make-up were made to compliment the location.
17. Avoid Lens Flare
Lens flare is the detriment of any sunny shot.
When shooting into the light, try ditching your lens hood and shielding the front of the lends with your hand. Keep taking a few shots until you find the angle that will shield your camera just right.
18. Use Natural Light

Using natural light, otherwise known as ambient light, can really add to the mood of your shot.
Whether you're taking a portrait or interior photo, unintentional sunlight or artificial lights aren't your enemy. Instead, find ways to incorporate these light sources, as they can flush out dark spaces, or provide great backlighting.
19. Include Odd Numbers

Ever noticed that there's a lot of odd numbers in photography? Especially pairs of three? You will now!
Regardless of the type of shot you're taking, odd numbers give your composition a more balanced feel. This is easy to achieve when you're moving your subject around yourself, but you'll need a vigilant eye when capturing something out of your control.
Be patient and keep your eye out for those perfect pairs of three.
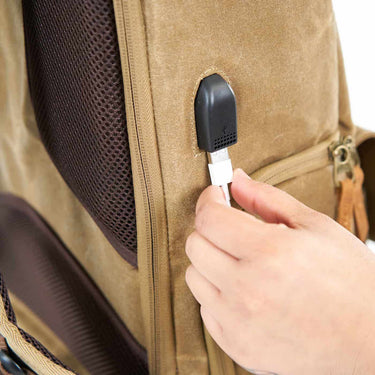
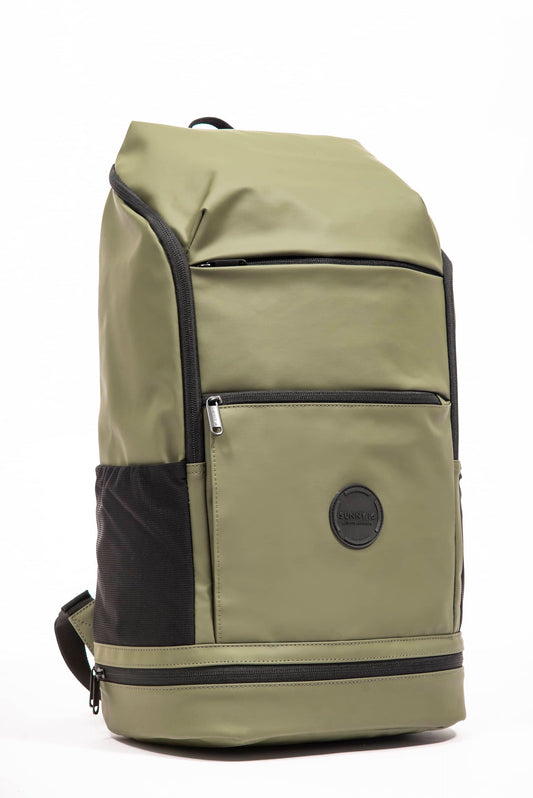
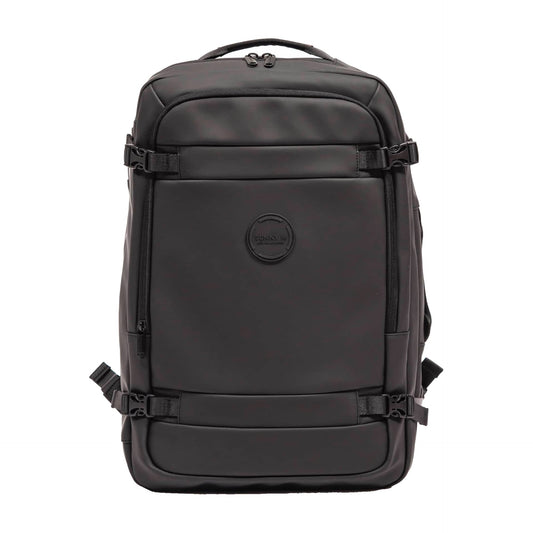
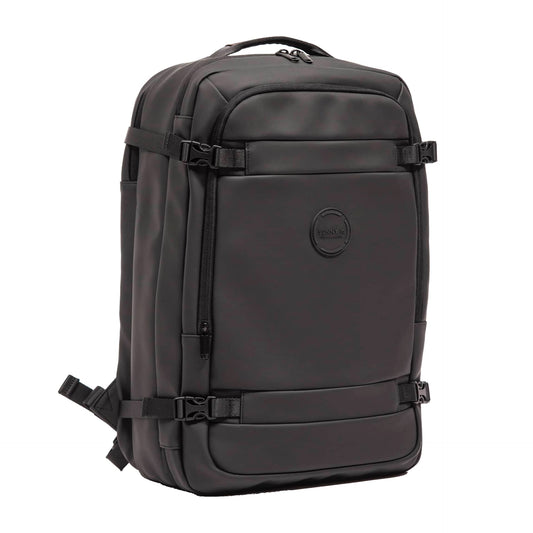
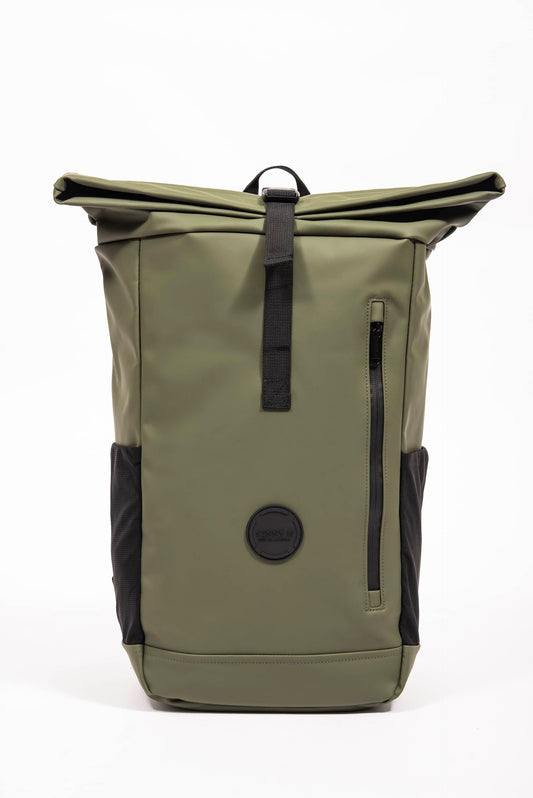
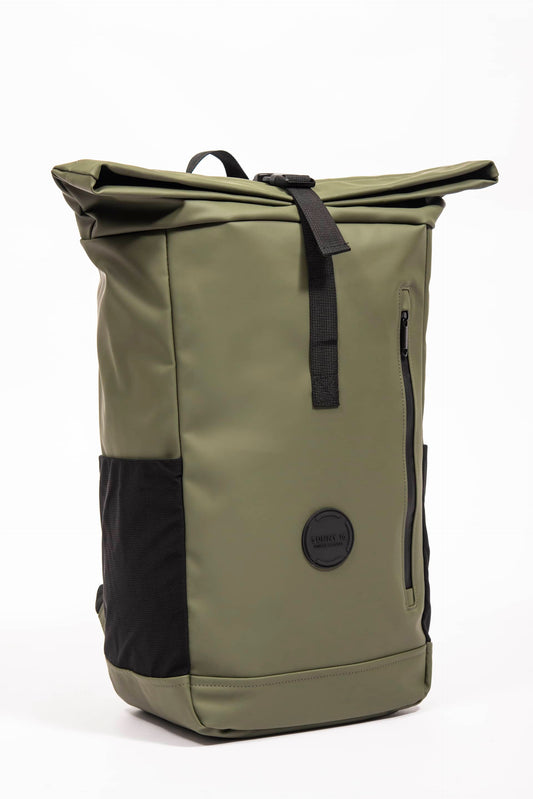
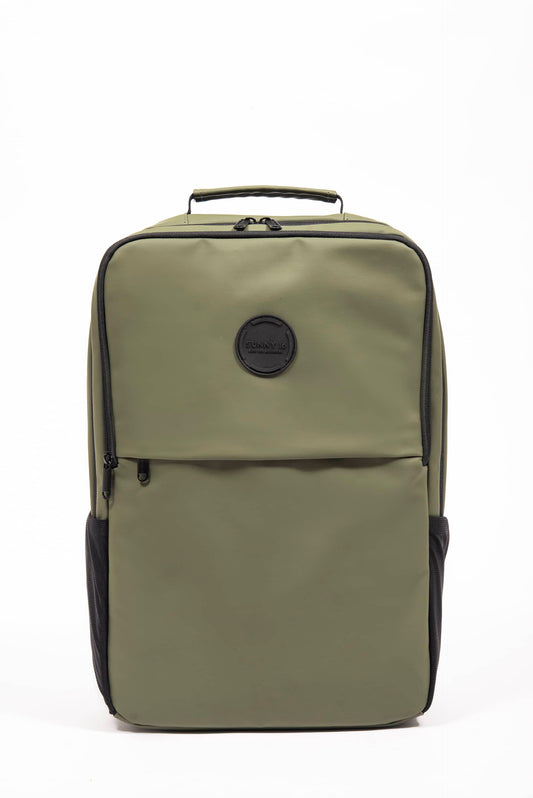
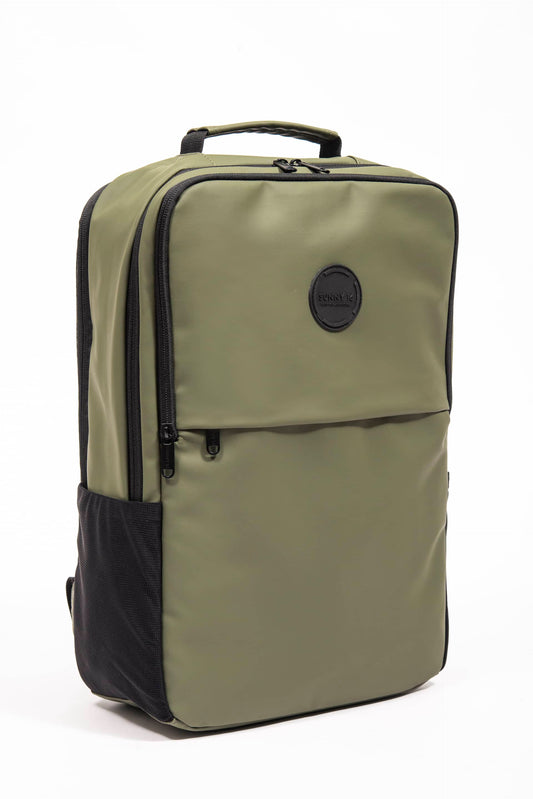
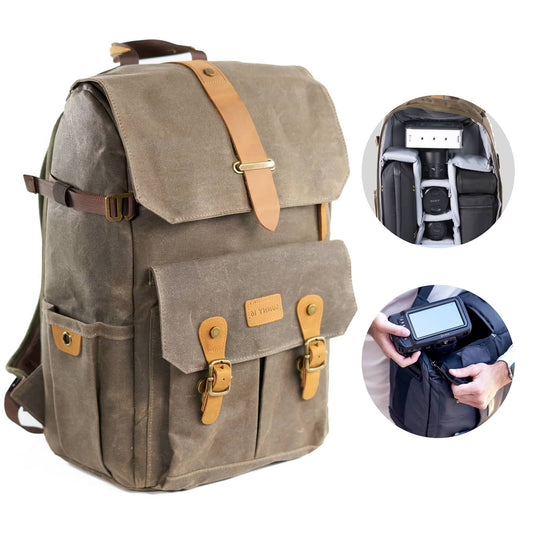
20. Side Access Camera Bags

If you’ve seen one camera bag, you’ve seen them all — but not quite.
While this is often not talked about, but a great camera bag can instantly improve your photography when you’re on the move.
When searching for the best camera backpack, you need to make sure there is side access so you never miss a shot or slow down during your shoot.
If you’re tired of searching, we recommend the Voyager camera backpack which features side access, along with water-resistant material and zippers, lockable zippers for extra security, excellent padding, and tons of storage space for your camera gear.
This photography tip is valuable whether you already own a camera backpack or still on the hunt for a new one.
21. Use Shutter Priority

Need to capture a sharp shot? Try this photography tip!
To guarantee a fast shutter speed, use Shutter Priority. You can dial in your preferred shutter speed, and switch to Auto ISO. Luckily, in this setting your camera will adjust the aperture and sensitivity on its own.
22. Depth of Field

Depth of field is easily affected by how narrow or wide your aperture, and can create some interesting effects.
For instance, you can maximize landscape depth of field through hyperfocal distance. Hyperfocal distance is the focus distance giving the maximum depth of field. Therefore, it'll give you the best depth of field closest to the camera.
Your desired depth of field can change depending on the subject. For a portrait you might want a very blurry background, whereas in a forced perspective shot you might want little to no depth of field at all.
23. Rule of Thirds

Whether you're shooting a landscape or a wedding photo, too much symmetry in your shot can throw off your composition.
Instead, try adding a touch of asymmetry to your shots. Think about using the rule of thirds when you're composing your subject.
While this sounds like a basic wedding photography tip, it takes a lot of snaps to master.
24. Wide Aperture

Ready for another portrait photography tip? Here's another one for you!
If you're taking a close up portrait, or any shot where you want the focus to be the foreground, try using a wide aperture.
Wide aperture can be anything between f/1.4 and f/4. These aperture settings will blur your background, allowing you to focus entirely on your subject.
Don't be afraid to experiment, and remember that the lower the number, the wider your aperture will be.
25. Small Aperture

On the other hand, a small aperture allows you to capture your foreground and background in complete focus. This technique can be useful for capturing sweeping landscapes, or forced perspective shots.
Try setting your aperture to f/11 or higher for the best results.
26. Use Flash in Daylight

Using your flash in daylight is all about balance and is valuable when you’re looking to make your subjects ‘pop’ from the background.
You can use flash as your key light (with the sun backlighting your subject), or use it as fill light.
First, switch off your flash and set your exposure to daylight. Then, use Manual mode so you can lock your settings, and set your exposure in accordance to the brightest part of your scene.
27. Shoot towards the Light

From sunlight to sparklers, shooting into the light can have dramatic effects.
However, it's important to be wary of lens flare or overexposure. Try shielding the front of your lens with your hand, and keep an eye on how bright or dark your shot is.
You might even get lucky sometimes and achieve some really cool lens flare effects.
Up Next: The Best Photography Techniques
Now that we’ve helped with these photography tips for beginners, let’s take a look at something a bit more advanced to take your shots to the next level. In the next article, we’re going to look at some advanced photography techniques that you’ll need to try out during your next shoot.


