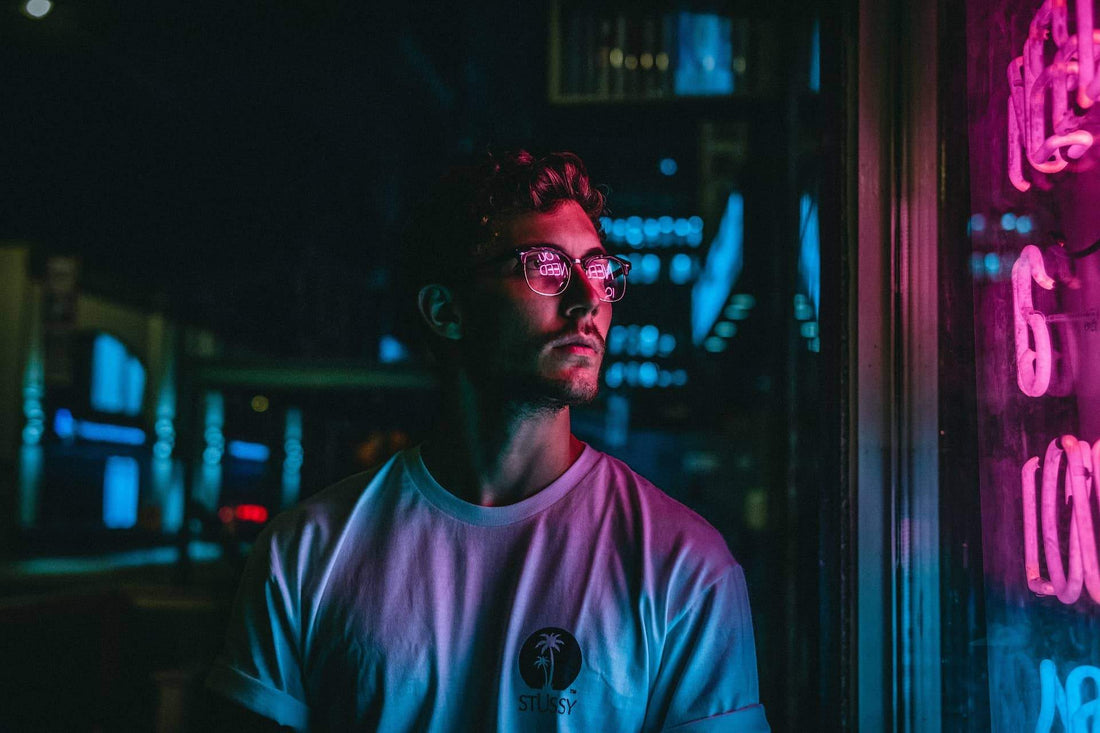
23 Flash Photography Tips and Techniques
Share
Lighting is essential in photography. That's why understanding flash photography is important in gaining artistic control over your subject.
Using your flash isn't as difficult as you may think.
In this list, we'll look at basic flash photography tips, address key terms, and prepare you to start using flash in your next photo shoot!
But first...
Why use flash photography?

At times, the ambient light is not enough. Using flash photography provides more light. This helps you maintain the camera settings you want. Other times external camera flash helps you create the right mood for your photos.
Without camera flash light photos can be blurry or contain excessive amounts of digital noise. When you choose a slow shutter speed it’s easy to move the camera while taking the photo. Your subject may also move. In both these situations, the photo will blur because of the movement. Using flash photography, you can use a faster shutter speed and avoid issues of movement blurring.
Whenever you use flash photography you must be careful of your camera flash lighting setting. Too much or not enough light from your camera flash light can make a real mess of your exposures. Your photos can end up being way too bright or very dark.
Do professional photographers use flash?
Professional photographers use any tool available to achieve a desired effect, including flash. Skill in lighting your subjects is essential, so mastering flash photography is a must for any professional.
How to set up flash photography
Flash photography alters the look and mood of your pictures.
Using outdoor flash photography on dull days will add extra pop to your pictures. When the light is flat you can take a flash photo to enhance the mood. Your subject will be brighter and more vibrant.
Indoor flash photography involves balancing ambient light, controlling aperture and flash photography settings, and more.
Let's go ahead and get into the list of flash photography techniques!
23 Best Flash Photography Tips
- Balancing Ambient Light
- Considering Shutter Speed
- Using External Blur
- Using Rear Sync
- Light Direction Control
- Bounce the Light
- Softbox Light Diffuse
- Embrace the Brightness
- Controlling Aperture Settings
- Filtering Your Lens
- Reflecting the Flash
- Removing the Flash
- Controlling Flash Distance
- Under Exposure
- Backlighting
- Gelling Your Flash
- Add Flash to the Background
- Matching Ambient Light Temperature
- Rely on TTL Settings
- Manual Flash Photography
- Flash Photography Light Painting
- The Golden Rule
- Spare Flash Batteries
1. Balancing Ambient Light
 This is one of the most important flash photography tips. Taking into account ambient light in your shot will determine how much, if any, light from your flash is required. This is especially important in outdoor flash photography.
Find the sweet spot with your camera flash light setting. Measure the ambient light and set your flash to balance for it. The sweet spot is when you achieve the look you want. This may mean over or underexposing your flash output.
Gaining a deeper understanding of this will require you to take a flash photography tutorial with lots of practice.
2. Consider Shutter Speed

Shutter speed is the amount of time the shutter is open, with light hitting the camera sensor. The longer it stays open, the more light comes in.
The shutter speed you choose will affect the exposure caused by ambient light, but not by your flash photography equipment. A faster shutter speed is more likely to freeze movement and will allow less ambient light to affect your exposure.
3. Using External Blur

Controlling your shutter speed allows you to manage the amount of blur when there’s movement in your shot.
Keep your shutter open to allow light to continuously enter your shot. The result can be a cool blur effect simulating movement. This technique isn't appropriate for every occasion, but it's a trick you should have in your arsenal.
This lighting technique could be perfect to use during golden hour photography as well.
4. Using Rear Sync

Set your camera so the flash fires just before the shutter closes, rather than just after it opens. This creative approach is best with movement and slower shutter speeds.
Flash photography basics often don’t include this. The effect can be very cool but the technique can be challenging to master. Practice and experimentation are essential.
5. Light Direction Control
Adding a snoot to your flash controls the direction and spread of the light. When you only want light from your flash in a small part of your composition this is how you do it.
Using a snoot you can light your model, but not the background. It’s also good for adding a hair light.
6. Bounce the Light

In general, you want to avoid pointing the external camera flash directly at your subject, as this washes it out. Instead, you'll want to bounce the light off another surface.
The multi-directional head on a flash allows you to point it at the ceiling when you’re shooting indoors. Bouncing the flash spreads the light and softens it. This is a simple technique to help avoid ugly dark shadows behind your subject.
7. Softbox Light Diffuse

Direct unmodified external camera flash produces a very harsh light. This is not often flattering in a flash photo.
Using a small softbox with your flash softens the light and makes it more natural looking. This works really well when you photography subjects against a white backdrop.
8. Embrace the Brightness

On certain occasions, you may wish to leave your flash unmodified for a more dramatic look.
Because the flash head is so small it emits a very harsh light. Dark, hard shadows and bright highlights can create a particular look and feel to your photos. Think of the street portraits Bruce Gilden makes.
9. Controlling Aperture Settings

The aperture setting you choose affects the exposure of both the ambient light and the flash. This tip can help you preserve your flash batteries because the output is lower each time the flash fires.
In general, the wider the aperture you choose, the less light from your flash you’ll need. The photo above illustrates the difference between two aperture settings.
This is one of the most powerful photography tips and tricks for beginners.
10. Filtering Your Lens

To have better control over how much light enters your shutter, consider using an ND (neutral density) filter or polarizer.
These filters reduce the amount of light entering your lens. You’ll be able to choose a slower shutter speed when you want to. A wider aperture causing a shallower depth of field will also be possible.
11. Reflecting the Flash

Using a reflector to bounce your external camera flash gives you more control than bouncing light off a ceiling. You can also use it outdoors.
Combining off-camera flash and a reflector gives you a lot of flexibility over the direction of your light.
12. Removing the Flash

Using off-camera flash diversifies the look of your flash photos. Restricting flash use to on-camera produces a very limited look.
Being able to control the location of your flash gives you more ability to shape the look of the lighting, so experiment with placing it in a variety of places.
13. Controlling Flash Distance

You'll want to get used to experimenting with the distance between your external camera flash and subject, as this can significantly alter your shot.
Bringing your camera flash light closer to your subject produces a different quality of light than when you fire it from further away. Try taking your flash off-camera and bringing it in as close as you can to your subject without getting it in your frame. Then move it far back. Compare the difference in the two photos.
14. Under Exposure

You may choose to create a high-contrast effect with very little shadow detail. In this case, under-exposing the shot is a good technique to have in your toolbelt.
When you measure your exposure, set your flash output to be two stops less. This can be done manually or by using your flash exposure compensation. The effect of the flash may be barely noticeable, but it can do a great job of softening hard shadows caused by the bright sun.
15. Backlighting

Placing your flash directly behind your subject will produce an interesting look. You can do this to make a silhouette or to create an interesting rim light effect with the right subjects. With outdoor flash photography, you can use natural light for this effect.
Using flash photography techniques like this the right way you’ll learn how to make much more dynamic photographs.
16. Gelling Your Flash

Use colored gels to create a different look!
Adding a strong color to your flash light produces a very different look and feel to the light. The light temperature your camera flash outputs is daylight balanced. It appears neutral in photos. By adding gels you can create all kinds of different colored light.
17. Add Flash to the Background

Instead of illuminating your subject with your flash, try aiming it at the background!
This can produce very cool effects. You may need to experiment so the flash is aimed at the best spot. Adding a gel will produce a cool colored wash look.
18. Matching Ambient Light Temperature

When working indoors with ambient light from an electric light source, there may be a color shift in those lights. Fluorescent light is often cooler and looks a little green. Mercury vapor lights are also cool. Halogen and tungsten produce a warm yellow cast.
Using a magenta gel on your flash balances for the cooler temperature lights. A blue gel compensates for warmer light sources. If you don’t gel your flash there’ll be two light temperatures in your images.
19. Rely on TTL Settings
Most of the time setting your flash to TTL will give you a well-balanced exposure. This works particularly well when you are controlling your camera’s exposure manually.
What does TTL mean in flash photography?
TTL is an acronym that stands for "through the lens." Camera flash light settings can be confusing when you are not used to managing them. Using the TTL flash photography technique can help you get great photos while you learn to master your flash photography basics.
20. Manual Flash Photography

In some tricky situations, TTL does not work so well. It’s best to switch your flash to manual and be in full control. You may think it’ll be difficult to know what setting to use, but it’s really not. Practice with your flash set to manual mode a few times and you’ll get the feel of it before long.
In situations where your subject has a strong backlight, using your camera flash light set to manual can often be more effective than using TTL.
21. Flash Photography Light Painting

"Painting" with light can create a surreal, artistic pattern in your photos.
Set yourself a nice long exposure and paint your subject with light. Handhold your flash and fire it multiple times while your shutter is open. You’ll need to set it on manual to do this. Using a low power setting means your flash will recycle quicker so you can pop more light into your subject from different angles.
Keep in mind that you'll need to update your ISO accordingly when slowing down the shutter speed.
22. The Golden Rule

There’s one rule you’ll want to keep in mind when applying any and all techniques:
The further you move your flash away from your subject, the less light will affect it.
The look of shadow produced by the flash will be different when it’s further away as well. Have a look at this handy chart for reference:
23. Spare Flash Batteries

As your batteries get low the flash will take longer and longer to recycle. If you’re firing shots rapidly and the flash has not fully recycled you’re running the risk of underexposing some of your photos. Change your flash batteries before they are completely drained!
The Best Photography Composition Techniques
That's our list for the best techniques to improve your use of flash photography! Let us know in the comments: which of these flash photography tips will you be using on your next shoot?
Now that you've got an understanding of basic lighting technique, check out our tips for shot composition!









1 comment
Nice to read this post! Each point describes a great process that helps you to make an innovative photo. In case of any need for a studio, you can contact Samson Stages. https://samsonstages.com/